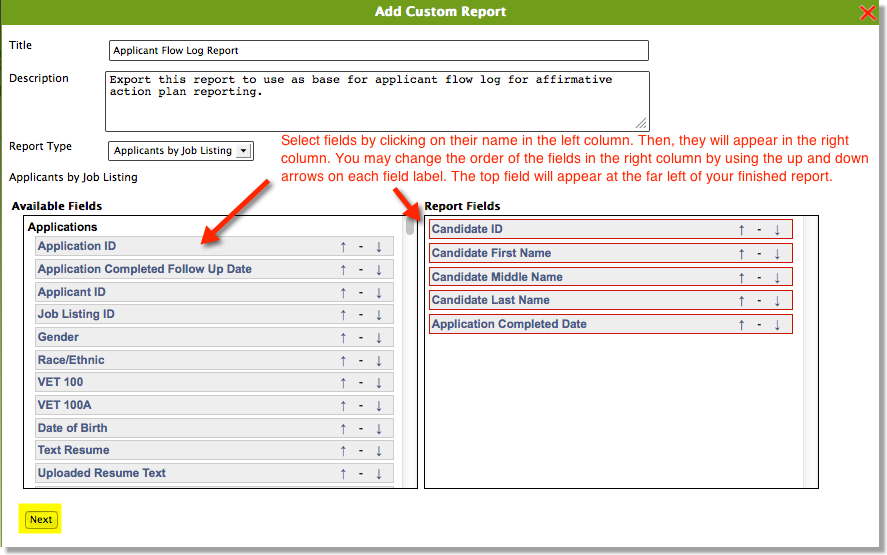
The Report Builder allows you to display individual applicant information for each column header that you select.
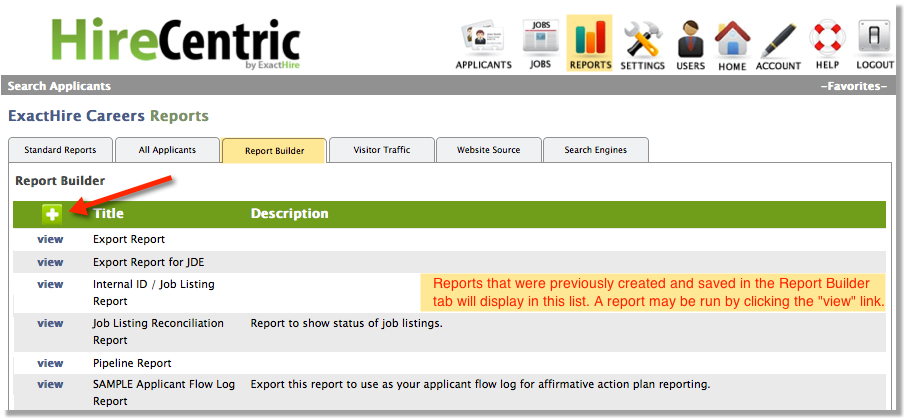
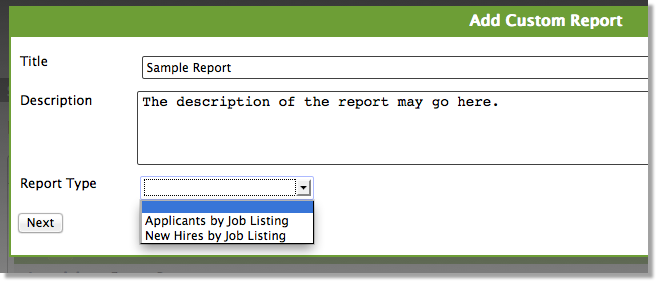
While there are plenty of helpful reports in the Standard Reports tab of the Reports dashboard, sometimes you have a report need that may not be exactly met by an existing report. Worry not! The ATS's ad hoc custom report building tool, the Report Builder, can be a resource for you to build and save your own applicant-centric reports that may be run anytime you like in the future. Choose to include virtually any fields from your employment application, as well as fields from job listings and HR Data Surveys as they pertain to applicants. The Report Builder allows you to display individual applicant information for each column header that you select. Let's walk through the steps to create a new report.
Navigate to the "Report Builder" tab within the Reports dashboard. If previous reports have been saved, they will be listed in this area. If this is your first time creating a report in this tab, then the screen will be blank. To create a new report, click the green plus icon.


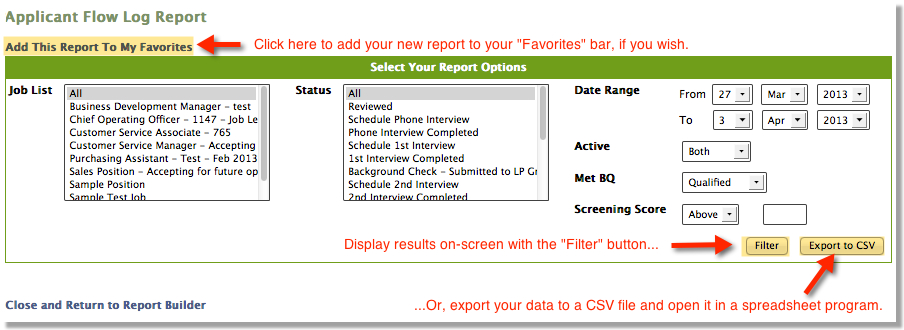
- Date Range - If using an "Applicants by Job Listing" report type, then results will include all applications submitted within these dates. If using a "New Hires by Job Listing report, then results will include applications for all candidates that were marked as hired (using a "hired" status code) in between these dates.
- Active - Choose to display either all active applications, all archived applications; or, both active and archived applications.
- Met BQ - Screening Questions - Choose to display either applications that met basic qualifications based on screening question filters, applications that were marked disqualified based on screening question answers; or, both types of applications.
- Screening Score - Choose to display either applications that were above or below a specific screening score of your choice based on applicant answers to screening questions with filters enabled. Note: Regardless of whether "above" or "below" is selected, results will include the score specified. For example, if viewing applicants with a score above 30, then results will include any applicants who scored exactly 30. Conversely, if a score of below 30 is selected, applicants scoring exactly 30 will be included in those results, too.
- Is Flagged? - Survey Questions - Choose to display either applications that were marked qualified based on survey responses (for example, HR Data Surveys or Reference Check Surveys), applications that were marked disqualified based on survey responses; or, both types of applications.
- Survey Score - Choose to display either applications that were above or below a specific survey score of your choice based on responses to surveys with filters enabled. Note: Even if your portal does not elect to take advantage of scoring/flagging options on surveys, these filtering drop-down boxes will still appear in reports.